
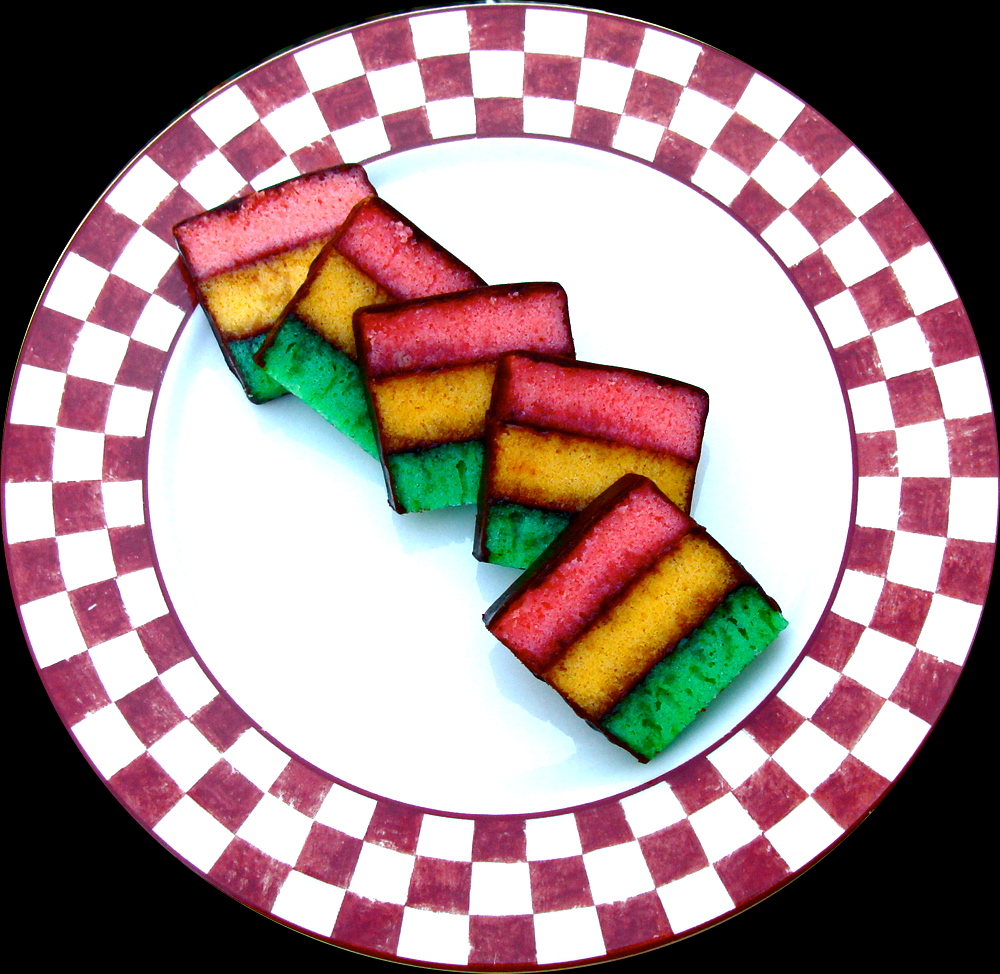
The one word that comes to mind when I think of tri-color cookies is LOVE! I have been completely crazy about these little gems since childhood. Maybe it's because they're so colorful, or maybe it's because they look like little presents! I would always wonder how they could get all those colors in one little cookie, and more importantly how anything could taste sooo delicious!? Every time my mom would take me to the bakery, which to me was like going to a party, I knew exactly what I was going to get. I didn't want any part of anything else. Well except for maybe a whipped cream eclair, or a piece of that heavenly banana cream pie from Conte's bakery. Okay that's another blog post... Now back to the tri-colors, if the bakery was out of them complete devastation ensued. I know I tend to be a bit on the theatrical side, but they are the best thing in an Italian bakery.
If I was going to get technical I would say that they are more of a petit four than a cookie due to the fact that they are three thin layers of almond flavored sponge cake layered with raspberry jam and enrobed in chocolate. Some bakeries layer them with apricot jam and marzipan, but that just doesn't cut it for me. My recipe is pretty quick aside from the fact that you have to bake the three layers separately. Don't let that deter you, they are worth every minute you spend making them!
 |
| Colored Batters |
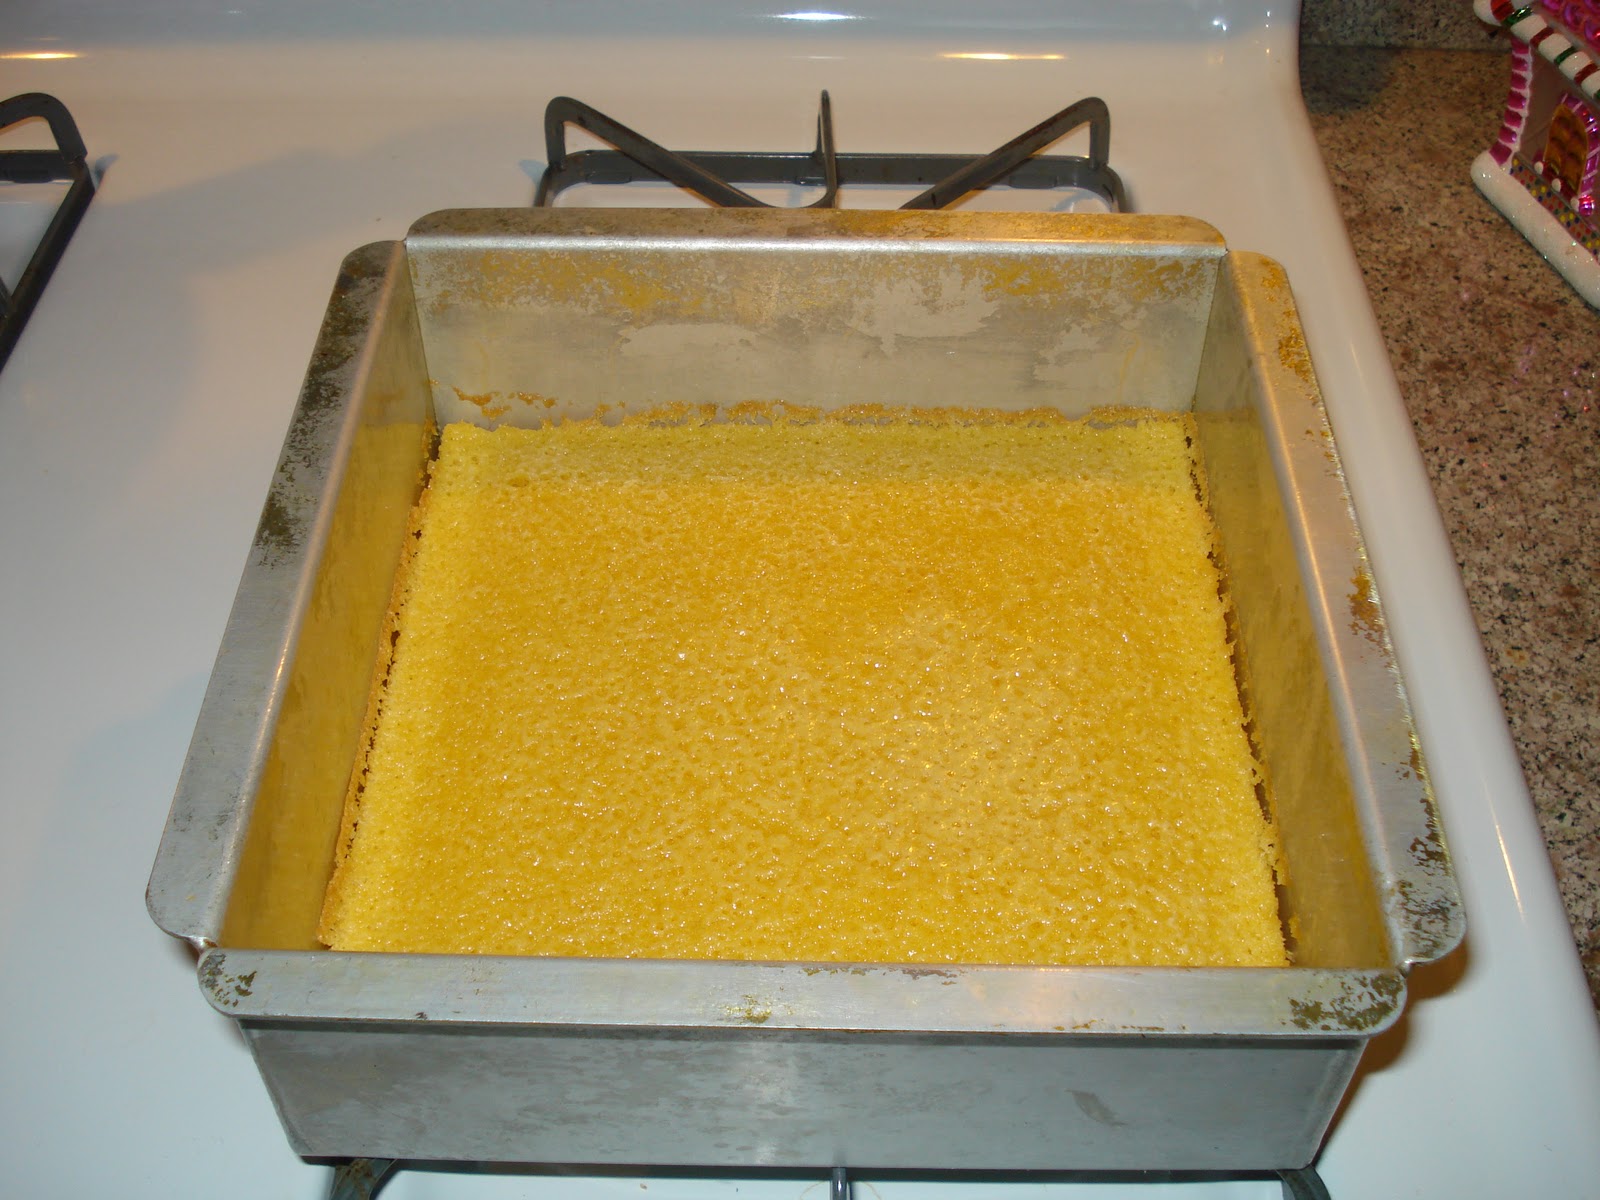 |
| Yellow layer fresh out of the oven |
 |
| Stacked and filled with jam |
 |
| Ready to be glazed... *note* I glaze them on a cooling rack on top of a piece of wax paper so the excess drips off and the clean up is 123 |
 |
| All dressed up and going in the fridge |
- 7 oz. almond paste
- 6 oz. unsalted butter
- 3/4 cup sugar
- 1/2 teaspoon pure almond extract
- 3 eggs
- 1 cup AP flour
- 1/2 teaspoon baking powder
- pinch of salt
- 4.5 oz. dark chocolate
- 2.5 oz. unsalted butter
- 1 teaspoon light corn syrup
- seedless raspberry jam
- Pre-heat oven to 350 degrees and grease three 8x8" pans.
- Cream almond paste, butter, and sugar in mixer till light and fluffy.
- Add eggs one at a time and then extract.
- Fold in flour, baking powder, and salt.
- Divide batter evenly(1 cup each) into 3 separate bowls.
- Color batter and pour into prepared pans.
- Bake for 10-12 minutes till cakes start to pull away from edges.
- When cakes are completely cool stack layers and fill with jam.
- Melt butter and chocolate in a double boiler and add corn syrup.
- Pour warm glaze over cookies.
- Refrigerate for a few hours and then slice.
- These cookies should be kept refrigerated and can be frozen for up to 2 months.
OMG! That looks sooo pretty! I love the colors you picked for those layers :D
ReplyDelete-Abeer @ www.cakewhiz.com
Thanks Abeer! The more pink the better!
ReplyDeleteMeghan
I love this!
ReplyDeleteHow adorable! These would be perfect for a tea party or a shower!
ReplyDeleteThis looks delightful! Love the three flavors, especially the almond! Fun post!
ReplyDeleteCheers from LikeMotherLikeDaughters.com
if you ever send me one of your famous "care" packages I want these in it...
ReplyDeleteOh wow! These look amazing!
ReplyDeleteYou have just answered my prayers. My daughter and I have been wanting to make the Rainbow Cookies for the longest time, and your recipe is the best so far. It's beautiful, and love the step-by-step direction photos.
ReplyDeleteJust found your blog, tried to follow you back but there was no link to find you. Just noticed you now, on foodbuzz! Thanks for following my blog!
Wow! These are really amazing!! They look so yummy. I'm your newest follower and friend on Foodbuzz. Cheers!
ReplyDeleteKelly @ somethingdifferentfordinner.blogspot.com
This is so cute and beautiful! Love your photos!
ReplyDeleteThese are my absolute favorite cookies. They look great!
ReplyDeleteThanks for all the cookie love! I'm happy everyone loves these cookies as much as I do :)
ReplyDeleteElisabeth let me know how they turn out when you make them!
Kelly thanks for following!
One of my all-time favorites too as a child (and adult)! Thanks for the great recipe and the follow on Twitter. I'm following you back. :) Hope to see you on FB too www.facebook.com/justabitedesserts
ReplyDeleteWow, these look so professional! I've been meaning to make petit fours for tea sometime!
ReplyDeleteI am so prould of you! You have turned into an unbielivable..I am not even gonna say pastry chef b/c your an artist!! Love U!!!!
ReplyDeleteThanks Emily! You should definitely try them!
ReplyDeleteThanks so much Laura :)
OMG these are the most beautiful rainbow cookies i've seen so far and I love them. thanks for sharing.
ReplyDeleteI won these as part of the Foodness Gracious Blog auction...they're great! Thanks! My kids were so excited when we sliced open the first little cake.
ReplyDeleteHi Olivia! So happy you all liked them! Enjoy :)
ReplyDelete